How to Create YouTube Shorts with AI for Free and Upload Automatically (2026 Guide)
If you want to create videos like these but don’t have a Claude subscription, or you’re using the free version of Claude, which runs out of usage limits very quickly, then today’s tutorial is perfect for you.
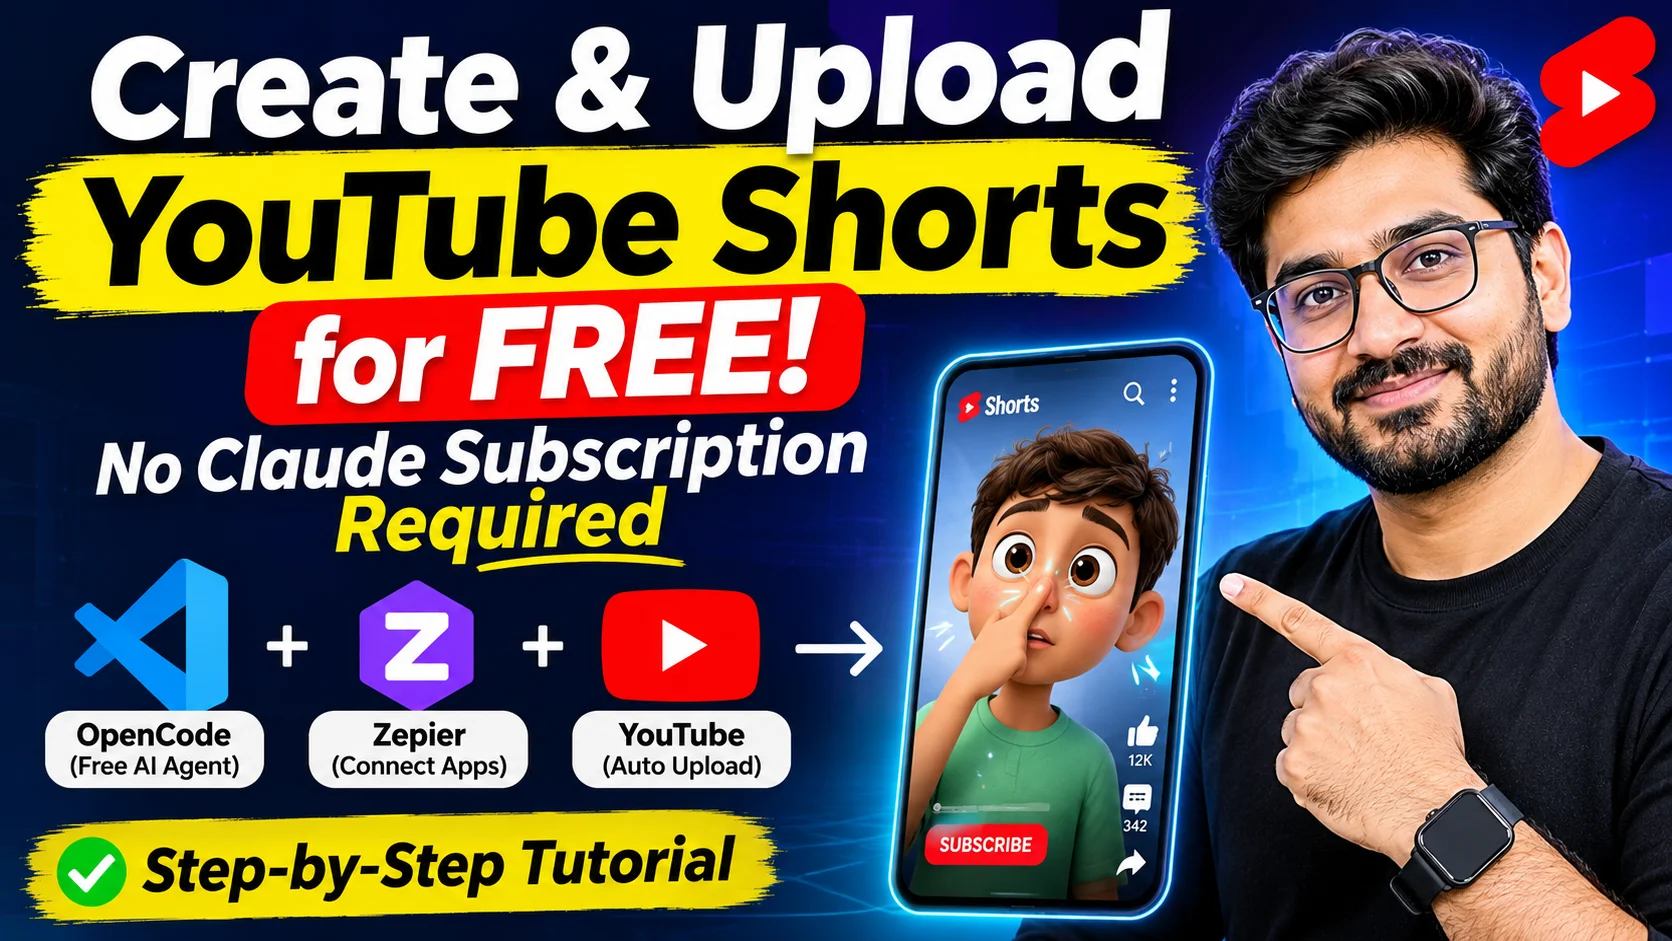
In this guide, I’ll show you how to create professional-looking YouTube Shorts completely free using an AI-powered workflow.
We’ll use OpenCode, an open-source AI coding agent that can work as a free alternative to Claude Code. I’ll also share a custom AI skill that allows you to create short-form videos with just one prompt and even upload them directly to YouTube.
You can see that the third video is already live on YouTube. Its idea, script, voiceover, editing, and upload were all handled by OpenCode. After completing the initial setup, I simply entered a one-line prompt.
Here’s what we’ll cover in this tutorial:
- How to install OpenCode on your computer.
- How to connect a free AI model.
- How to install a custom AI skill.
- How to generate your first AI-powered YouTube Short.
- How to connect OpenCode with YouTube using Zapier MCP.
- How to generate videos and upload them to YouTube using a single prompt.
I’ll also honestly explain how much time this process takes and where you might encounter problems, because even free tools come with certain limitations.
What Is OpenCode and Why Use It?
To use Claude Code, you generally need an eligible Claude plan or another supported usage arrangement, which can cost around $20 per month depending on the plan.
However, OpenCode is an open-source AI coding agent that supports multiple AI models, including free models.
Before we start, let’s understand one important thing.
OpenCode is an AI agent. An AI agent is different from a normal chatbot. Instead of simply answering questions in a chat window, an AI agent can perform tasks on your computer.
For example, it can:
- Create and manage files.
- Install required software.
- Run terminal commands.
- Write and execute code.
- Automate repetitive tasks.
- Connect with external applications through MCP.
This means you can give OpenCode a task and let it work through the necessary steps.
Step 1: Download and Install OpenCode
First, open your browser and search for OpenCode AI.
Visit the official website:
Click on the Download option to find the available desktop versions.
OpenCode supports:
- Windows
- macOS (Apple Silicon and Intel)
- Linux
Choose the version that matches your computer and download it.
Once the download is complete, open the installation file and follow the installation instructions.
After installation, launch OpenCode.
You’ll see the main interface, including a chat box at the bottom. This is where you’ll enter your prompts and communicate with the AI agent.
Before moving forward, one quick thing: if you want to learn AI agents and automation with practical, step-by-step demonstrations, you can also join the creator’s live AI workshop. The workshop link is available in the original video description.
Step 2: Select a Free AI Model in OpenCode
Now that OpenCode is installed, let’s connect an AI model.
At the bottom of the chat interface, you’ll see the currently selected model.
Think of a model as the brain of your AI agent. It’s responsible for understanding your instructions, thinking through the task, and generating the results.
Click on the model selection option.
You’ll see a list of available models. Some require paid subscriptions, while others are available through free usage options.
For this tutorial, search for:
GLM-5.3-Flash-Free
Select this model if it is available in your model list.
According to OpenCode’s model documentation, free model availability can change, so always check the latest model list.
Check OpenCode Models and Pricing
You may also see an Effort option next to the model.
Effort determines how much reasoning the AI should apply when completing a task.
I recommend starting with High. You can also experiment with higher settings, but more intensive reasoning may take longer or use more of your available quota.
Connect Your OpenCode Account
Depending on the model and provider, you may need to connect an OpenCode account before using it.
Open the File menu, go to Settings, and select Providers.
Look for OpenCode Console and click Connect if required.
Your browser will open, where you can create or sign in to your account.
Follow the authorization instructions and return to OpenCode.
Once connected, you should see your account status in the provider settings.
Important: Free model availability is not guaranteed forever. OpenCode can change its free model offerings, usage limits, or availability.
If GLM-5.3-Flash-Free is unavailable, check the same model list for alternatives such as DeepSeek V4.1 Flash Free, if currently offered.
The rest of the process remains largely the same.
Step 3: Download the Free MFM Faceless Shorts Skill
Now comes the most important part of this entire tutorial: the AI skill.
This is the skill responsible for creating the videos you’ve seen in the demonstration.
Think of an AI skill as a ready-made recipe.
Imagine asking a new cook to prepare biryani. If you simply tell them to make biryani, they’ll prepare it according to their own understanding.
But if you give them a complete recipe explaining the ingredients, quantities, cooking time, and preparation order, they’ll have a much clearer process to follow.
An AI skill works in a similar way.
It provides the AI agent with instructions about:
- How to write a YouTube Shorts script.
- How to generate voiceovers.
- How to create video scenes.
- How to add captions and subtitles.
- How to apply different visual styles.
- How to render and review the final video.
The creator has made this skill available for free through their Skool community.
Its name is:
MFM Faceless Shorts Skill
Join the community using the link provided in the original video description, download the skill, and save the ZIP file to your computer.
A ZIP file is simply a compressed folder containing all the files required for the skill.
You don’t need to extract it manually for this demonstration.
Install the Skill in OpenCode
Open the folder where you saved the downloaded ZIP file.
In the demonstration, the file was saved inside the Documents folder.
Now drag the ZIP file into the OpenCode chat box and drop it there.
You’ll see that the file has been attached to the chat.
Next, enter this prompt:
Prompt: Install the skill and make a 20-second Reel. Choose any interesting topic.
Press Enter.
In simple words, you’re asking OpenCode to install the skill you’ve provided and then use it to create a 20-second video on an interesting topic of its own choice.
That’s it. The AI agent will start working.
Step 4: Let OpenCode Generate Your First AI Video
When I ran this process for the first time, it took approximately 45 minutes to complete the first video.
Don’t worry if your computer takes some time. The first run involves several additional setup tasks.
1. OpenCode Checks Your Computer
First, the agent extracts the ZIP file and checks which tools are already installed on your computer.
In the demonstration, Node.js and Chrome were already available, but Python and FFmpeg were missing.
Python is a programming language, while FFmpeg is a powerful tool used for processing and editing video and audio files.
You don’t necessarily need to install everything manually. The agent can help download and configure the required dependencies when permitted.
Always review installation requests and only allow software from trusted sources.
2. The AI Selects a Video Topic
After checking the required software, the agent reads the skill’s style guide and chooses a topic.
For the first video, it selected:
What Happens If You Hold in a Sneeze?
It also selected the Inside Out visual style, which is a simple animated cartoon explainer format.
The agent then prepares the video plan, including:
- The script.
- Scene-by-scene instructions.
- Visual elements.
- Relevant facts and research sources.
- Voiceover requirements.
- Captions and sound effects.
One thing I particularly like about this workflow is that when an error occurs, the agent can often identify the problem and attempt to fix it automatically.
You don’t have to search Google for every small error.
3. OpenCode Downloads the Required Voice Model
The first video usually takes longer because the agent may also download a local voice-generation model.
In the demonstration, this model was approximately 1 GB in size.
The advantage is that the local voice-generation setup doesn’t require a separate paid voice API subscription.
Make sure you have enough free disk space before starting. The computer may need several gigabytes of additional storage for models, dependencies, and temporary video files.
4. The Agent Tests Different Video Styles
Once the initial setup is complete, the agent tests the available visual styles.
In the demonstration, one style test failed because the skill files hadn’t been copied completely.
The agent identified the incomplete copy, removed it, copied the files again, and successfully completed all six style tests.
The six available styles are:
- Deep Drive
- Inside Out
- Night File
- Paper Atlas
- Stick Story
- Tall Tale
You can request any of these styles when generating your videos.
5. The Agent Reviews and Fixes the Video
After generating the video, OpenCode also checks its output.
In the demonstration, it identified six issues.
For example, some captions were appearing over the character’s face.
The agent corrected these issues and rendered the final video again.
This is why I recommend being patient during the first run.
Start the process, let it work, and come back after some time.
In the demonstration, the first video took approximately 45 minutes because the initial setup was also happening in the background.
Step 5: Watch Your First AI-Generated YouTube Short
One useful feature is that OpenCode can open a preview of the generated video directly inside its interface.
You don’t need to navigate to another application just to check the result.
Let’s look at the first video.
The topic was about what happens when you hold in a sneeze.
The video includes:
- An AI-generated script.
- Voiceover.
- Animated scenes.
- Captions.
- Sound effects.
Honestly, the animation is simple, and the voice sounds a little robotic in places.
However, the interesting thing is that the complete 22-second video was generated without a separate paid video-editing or voiceover subscription in this workflow.
The agent also generated suggested titles, captions, and hashtags.
You can copy these directly into your YouTube title and description fields.
And if you don’t like something, simply give OpenCode another instruction.
For example:
- Change the voiceover.
- Make the captions shorter.
- Improve the animation.
- Change the background music.
- Make the introduction more engaging.
The agent can then attempt to regenerate the relevant parts.
Step 6: Generate Another Video on a Historical Topic
Now let’s create a second video.
You don’t need to start a new project or repeat the entire setup.
Simply enter another prompt in the same chat:
Prompt: Now generate another video, but there should be a historical element in it.
This time, the agent automatically selected the Paper Atlas style, which is designed for historical storytelling.
It chose the following topic:
The Anglo-Zanzibar War: The Shortest War in History
This is widely recognized as the shortest recorded war in history.
The conflict took place on August 27, 1896, and lasted approximately 38 to 45 minutes, depending on how the duration is calculated.
Before generating the video, the agent also checked the historical facts to make sure the dates and timeline were accurate.
The final video included historical storytelling, visuals, narration, and captions.
It also generated:
- Suggested video titles.
- Caption options.
- Relevant hashtags.
Again, you can copy these directly into your YouTube title and description.
Since the initial setup was already complete, the second video took approximately 50 minutes in the demonstration.
So keep in mind that AI video generation isn’t necessarily instant, even when the entire process is automated.
Step 7: Connect OpenCode to YouTube Using Zapier MCP
Now let’s move to the next important part.
We’ve successfully generated our videos, but how can we upload them directly to YouTube using a single prompt?
For this, we’ll use Zapier MCP.
First, understand that OpenCode needs a connection to external applications to perform actions such as uploading videos.
MCP stands for Model Context Protocol.
Think of MCP as a bridge that allows an AI application to communicate with external tools and services.
For example, it can connect an AI agent to applications such as YouTube, Gmail, Google Sheets, and other supported services.
Zapier MCP makes this connection easier by providing access to thousands of applications and their available actions.
Visit the official website:
Create a Zapier account or sign in to your existing account.
1. Connect OpenCode to Zapier
Once you’ve opened Zapier, go to its MCP section and follow the instructions for connecting an AI client.
You can also explore Zapier’s OpenCode integration:
OpenCode and Zapier Integration Guide
The connection process generally involves:
- Adding Zapier as an MCP server in OpenCode.
- Authorizing your Zapier account.
- Enabling the required application tools.
- Testing the connection.
In the desktop demonstration, the Zapier MCP connection configuration was used to connect OpenCode.
OpenCode can update its configuration file to include the Zapier server.
If you’re following the latest interface, use the current setup instructions rather than copying an older configuration format from another tutorial.
2. Save the Zapier Connection Globally
One important thing is to make the connection available across your OpenCode sessions.
If you configure it only for a particular project or session, it may not automatically be available everywhere.
Ask OpenCode to save the Zapier MCP configuration globally.
Prompt: Add this Zapier MCP connection to my global OpenCode configuration so it is available in all new sessions.
The agent can inspect your existing configuration and update the appropriate file.
If it encounters a configuration-format error, ask it to verify the current OpenCode MCP configuration format before making changes.
3. Authorize Your Zapier Account
After adding the MCP server, you need to authorize the connection.
OpenCode provides an authentication process for the Zapier MCP server.
Follow the sign-in instructions and select your Zapier account.
When the browser asks for permission, review the requested access and click Allow if you’re comfortable granting it.
Once authorization is successful, OpenCode should be able to discover the Zapier tools you’ve enabled.
For more information, visit:
Step 8: Add YouTube to Zapier MCP
Now that OpenCode is connected to Zapier, we need to connect our YouTube channel.
Go back to your Zapier MCP dashboard.
Open the application or tools section and search for YouTube.
Select YouTube.
You’ll find several available actions, including:
- Upload Video.
- Find Video.
- Add Video to Playlist.
- Update Video Thumbnail.
- Get YouTube Reports.
For this tutorial, enable the Upload Video action. You can also enable the other tools if you need them.
Next, connect your Google account.
Make sure you select the Google account associated with the YouTube channel where you want to publish your videos.
Follow Google’s authorization process and grant the requested permissions.
Once connected, return to Zapier and confirm that your YouTube account is available.
That’s it!
Your YouTube channel is now connected through Zapier MCP, and OpenCode can use the enabled YouTube tools.
For more information, visit:
Zapier YouTube MCP Integration
Step 9: Create and Upload YouTube Shorts with One Prompt
Now comes the most exciting part.
Remember the third video I showed at the beginning of this tutorial?
That’s exactly how it was created.
I returned to OpenCode and entered just one prompt:
Prompt: Create a faceless video with Tall Tale theme and upload it to YouTube.
That’s it.
The agent selected the Tall Tale style, which is designed for funny true stories.
It chose the following topic:
The Man Who Sold the Eiffel Tower
OpenCode then started creating the video.
It prepared the script, generated the voiceover, created the scenes, added captions, and rendered the final video.
Once the video was ready, the agent asked me two questions before uploading.
Question 1: What Should the Video Visibility Be?
The agent asked whether I wanted to upload the video as:
- Private: Only you and the people you specifically allow can watch the video.
- Unlisted: Anyone with the video link can watch it, but it generally won’t appear in public YouTube search results or on your channel’s public video listings.
- Public: Anyone can discover and watch the video.
I selected Unlisted because I wanted to review the video before making it publicly available.
Question 2: Select the Video Category
The agent also asked me to select a YouTube category.
I selected Comedy because the video was based on a funny historical story.
After confirming these options, OpenCode used Zapier MCP to upload the video.
And here it is!
Video 3 is now uploaded to YouTube.
The title was added, and YouTube processed the video as a Short.
One small issue: the agent reported that the category was set to People & Blogs instead of Comedy.
So always check the uploaded video in YouTube Studio before publishing it.
Review Your Video in YouTube Studio
Open YouTube Studio and navigate to the Content section.
You’ll find your uploaded video under Shorts.
Since we selected Unlisted, the video won’t be publicly discoverable.
Watch the entire video, check the captions, verify the facts, and make sure everything looks good.
Once you’re satisfied, change its visibility to Public.
Important Limitations You Should Know Before Starting
Now let’s discuss some honest points that are important to understand before building this workflow.
1. AI Video Generation Takes Time
Don’t expect OpenCode to create every video within a few seconds.
In the demonstration:
- First video: Approximately 45 minutes.
- Second video: Approximately 50 minutes.
These are the times from the particular setup used in the demonstration, not guaranteed generation times.
Your results will depend on your computer, internet connection, model availability, and video complexity.
2. Zapier Has Monthly Task Limits
Zapier’s free plan includes 100 tasks per month, subject to its current plan terms.
However, there’s an important detail: each successful Zapier MCP tool call consumes two tasks.
That means 100 monthly tasks can provide approximately 50 successful MCP tool calls, assuming no other Zapier activity uses your allowance.
For example, uploading a video through one successful MCP action generally consumes two tasks.
If your AI agent performs additional actions, such as searching for videos or updating thumbnails, those actions can consume additional tasks.
Check the latest pricing and usage details here:
3. Free AI Models May Not Always Be Available
The GLM-5.3-Flash-Free model used in this demonstration is offered with limited-time free availability.
This means the model could become paid, have its limits changed, or become unavailable in the future.
Always check OpenCode’s official model directory for current alternatives.
4. Automated Uploading Is Not the Same as Automated Scheduling
In this workflow, you give OpenCode a prompt whenever you want to generate and upload another video.
That doesn’t automatically mean your computer will create and publish a video every day without any further instructions.
For recurring publishing, you would need an additional scheduling or automation workflow, such as a scheduled Zap where supported.
5. YouTube Monetization Requires Original and Valuable Content
This is probably the most important point in the entire tutorial.
YouTube does not automatically reject a channel just because it uses AI-generated videos or faceless content.
However, YouTube’s monetization policies do not allow channels built around repetitive, mass-produced, or low-value content.
According to YouTube’s policy terminology, this includes content considered inauthentic.
Your videos should provide original storytelling, useful information, educational value, or meaningful entertainment.
For example:
- Don’t repeatedly publish nearly identical videos.
- Verify historical and scientific facts.
- Create original scripts and interesting narratives.
- Improve the editing and visual presentation.
- Add your own creative ideas and perspective.
- Review every video before making it public.
Read the official policy here:
YouTube Channel Monetization Policies
Faceless content and AI-assisted production can be part of a legitimate YouTube strategy, but originality and viewer value still matter.
My Recommendation: Focus on One YouTube Shorts Niche
One more piece of advice.
Don’t start a channel, upload videos for one week, and then abandon it.
Choose a specific niche and focus on it consistently.
For example:
- Historical facts and stories.
- Science and educational explainers.
- Interesting human body facts.
- Technology and artificial intelligence.
- Mystery and storytelling.
- Interesting facts about the world.
Try to build a consistent content strategy for at least six months.
Focus on improving your scripts, video quality, storytelling, and audience retention.
Over time, you’ll understand which topics your audience enjoys the most.
Complete Recap: How to Create and Upload YouTube Shorts Using AI
Let’s quickly recap everything we’ve done.
- Step 1: Download and install OpenCode from its official website.
- Step 2: Select a free AI model, such as GLM-5.3-Flash-Free, if currently available.
- Step 3: Download the MFM Faceless Shorts Skill from the creator’s Skool community.
- Step 4: Drag the ZIP file into OpenCode and ask the agent to install the skill.
- Step 5: Generate your first AI-powered YouTube Short using a simple prompt.
- Step 6: Connect Zapier MCP to OpenCode.
- Step 7: Add your YouTube account to Zapier and authorize the required permissions.
- Step 8: Ask OpenCode to create a video and upload it directly to YouTube.
And that’s it!
You now have a workflow that can handle video ideas, scripts, voiceovers, editing, captions, and YouTube uploads with a single prompt after the initial setup.
Your Homework: Try This AI Video Automation Workflow
Here’s your homework for today.
First: Download the MFM Faceless Shorts Skill and generate your first video.
Second: Upload the video as Unlisted and watch it yourself. Identify anything you don’t like and ask the AI agent to fix it.
Third: Share your first video link in the comments. The creator will personally check some of the videos.
And if you want to learn all of this step by step, you can join the creator’s live AI workshop.
You can learn how to build practical AI agents, automation systems, and real-world projects during the sessions. You can also ask questions and get answers live.
The workshop link is available in the original video description.
If you found this tutorial useful, make sure to subscribe to the channel for more practical AI tutorials.
Thank you so much for watching. Take care, guys!
💰 Want to Make Money Online?
Join our WhatsApp Channel for proven tips on side hustles, passive income, affiliate marketing, and more!
🚀 Join Now & Start Earning!